Update · BikePartPicker Updates
Plan Bike Upgrades Starting With the Bike You Own
Start with a reviewed stock bike, choose your size, and explore replacement parts in BikePartPicker. Follow the workflow with a Trek Checkpoint example.
By BikePartPicker Editorial
Published · 5 min read
Start With What's Already on Your Bike
Planning an upgrade often starts with a smaller question than planning a whole bike: what can I change while keeping the rest of my setup?
You might want different tires for the roads you ride, a shorter stem, or a replacement for a worn drivetrain part. Before comparing options, you need to know what's already on the bike and which details matter for the change.
The new Bikes section gives you a starting point. Open a listed bike, choose the size and configuration that matches yours, and bring its reviewed stock components into an upgrade build. You can then explore replacements with the rest of the bike already in place.
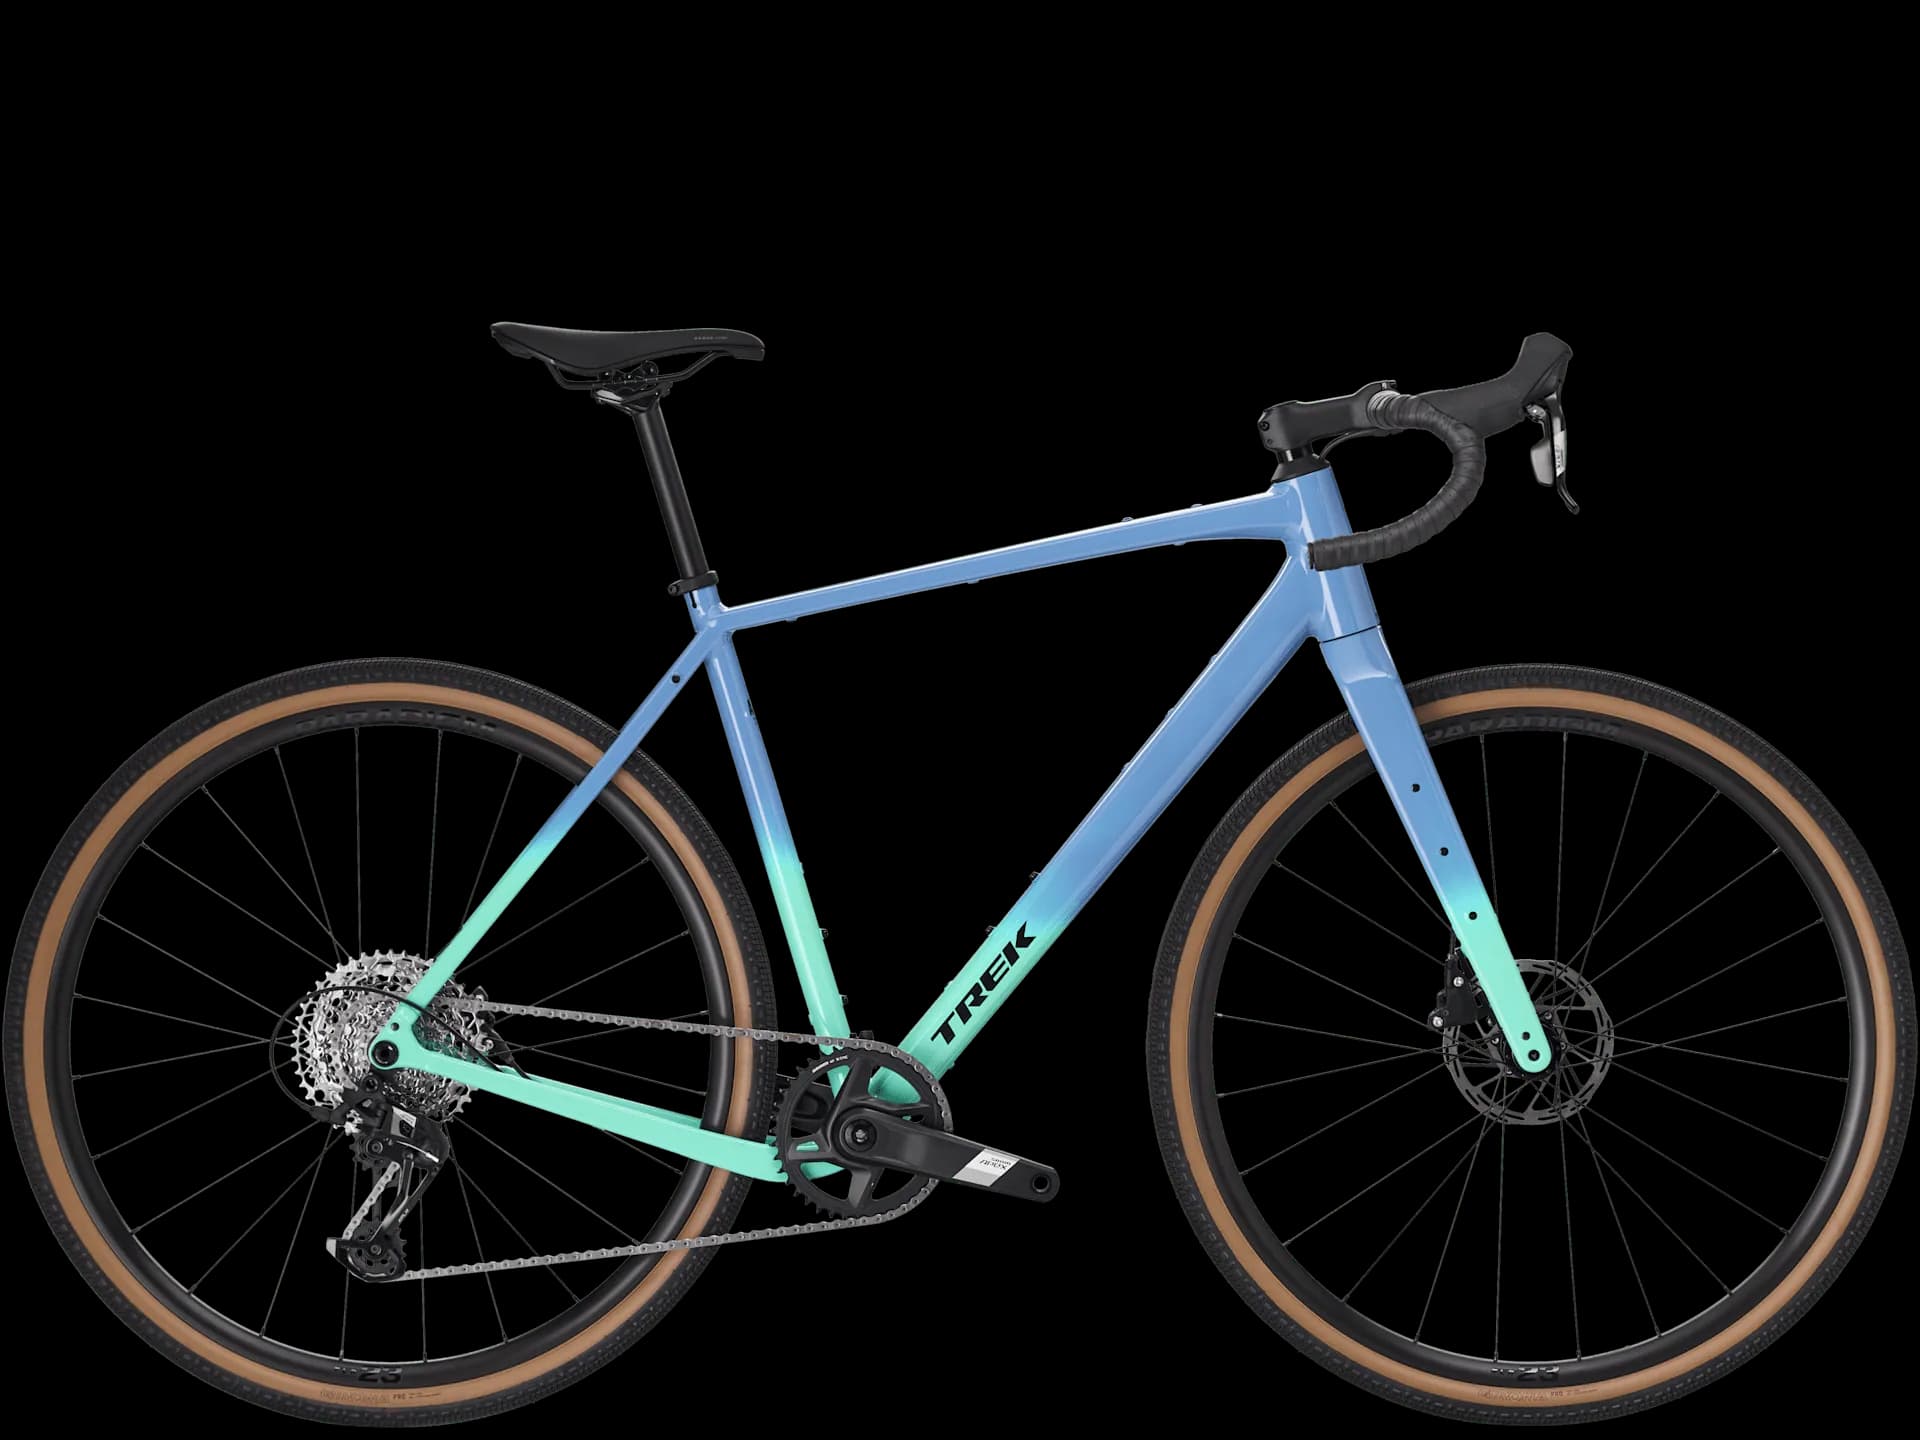
Here's how that works using the 2026 Trek Checkpoint ALR 5 Gen 3.
1. Find the Exact Bike and Choose Your Size
Start on the bike's page and confirm the model, generation, and year. Our example link opens size L; choose the size that matches your own bike before editing it.
That distinction matters because a complete bike's component dimensions can vary by size. On the size L Checkpoint page, for example, the reviewed stock build lists a 172.5 mm crankset and a 90 mm stem.
The page also brings together published geometry, rider-height guidance, and advertised weight where available. Read the notes alongside those measurements: a manufacturer's advertised weight may have been measured on a different size.
Treat the stock specification as a starting point to compare with your actual bike. If you've already changed parts, or your bike came with a different factory specification, account for those differences before evaluating another replacement.
2. Review the Stock Components
The stock specification is grouped into chassis, wheels and tires, drivetrain, brakes, and cockpit. Linked components let you inspect the corresponding part pages.
For the Checkpoint example, you can see the stock 700c × 42 mm tires, 40-tooth crankset, and 12-speed 11–44T cassette together with the wheels, controls, brakes, and cockpit parts.
Read any qualifications attached to a listing. The Checkpoint page, for instance, identifies its brake links as matching SRAM Apex D1 retail packages. That distinction helps you understand what a linked product represents without assuming every retail package is identical to the factory assembly.
Missing stock details remain explicit. The aim is to give you a useful baseline with its evidence visible.
3. Select Edit This Bike
Choose Edit This Bike to open an upgrade build populated with the reviewed stock components for your selected configuration.
The existing parts appear as original equipment. You can keep them in place while exploring the component you want to change, instead of first recreating the whole bike as a parts list.
The upgrade build is saved on your device. Keep that in mind if you switch browsers or computers.
4. Explore One Replacement at a Time
Suppose you're considering different tires. Use the change control for the front or rear tire to open the selector. Candidate parts are evaluated against your current build, and you can narrow the list using the available filters and inspect a product's details before adding it.
Start with one change so you can see what it affects. If you're replacing both tires, work through both positions. If you're exploring a drivetrain change, pay attention to the other components it depends on rather than treating the cassette, derailleur, and controls as isolated choices.
The same workflow gives you a place to explore changes to wheels, cockpit parts, and other supported components. Keep the parts you intend to retain in the build so that the plan reflects your actual setup.
5. Read the Compatibility Notes and Replacement Summary
The upgrade view shows a replacement total and replacement weight where data is available. Use these as planning information, and read them alongside the component listings and current offers. A missing price or weight is still missing information.
Compatibility notes are just as important. A conditional result needs its stated conditions checked. An unknown or unverified result means the reviewed information does not settle that check.
Even the original stock build can show unverified notes when a required measurement or interface detail has not been documented in the catalog. That is a reason to investigate the missing evidence; it does not by itself establish a mismatch.
Before purchasing, verify the exact replacement and any unresolved requirements against current manufacturer documentation and your actual bike. A qualified mechanic can help confirm measurements and installation requirements.
6. Get a Second Opinion
When you have a plan you want someone else to review, use Create Build Link to make a shareable build link.
Give the person reviewing it some context: what you're trying to improve, which parts are staying, and which compatibility notes still need confirmation. That makes the parts list easier to discuss with a friend or mechanic.
Try It, Then Tell Us Which Bike to Add Next
Open the Trek Checkpoint ALR 5 Gen 3 example, choose your size, and select Edit This Bike to explore the workflow.
Which bike should we add next? Send us the brand, model, model year, and the upgrade you'd like to plan. Include the generation or trim if you know it, and an official specification link if you have one.
Suggest a bike through our contact page, or leave a comment on our Instagram or Facebook posts. If a listed specification needs correcting, use Corrections.